Disclosure: This post contains affiliate links. As an Amazon Associate, we earn a small commission from qualifying purchases at no extra cost to you. We only recommend products we truly love and trust.
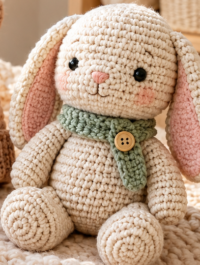
As a baby crochet enthusiast, in this article, we will explore step-by-step how to craft a cute and soft handmade crochet baby toy.
Welcoming a new baby into the world is one of life’s most joyous and anticipated milestones, and nothing captures that pure excitement quite like a handmade gift. If you are searching for a creative project that is equal parts adorable, engaging, and deeply comforting, look no further than this delightful Cute Animal Amigurumi Toys for Babies: Free Crochet Rattle Pattern. Handcrafted toys hold a very special kind of magic; they carry the warmth, dedication, and genuine love of the maker in every single loop and stitch.
If you are a beginner crafter who feels intimidated by complex stuffed toys, intricate shaping, or advanced amigurumi techniques, this project is designed specifically for you. Creating boutique-quality baby toys does not require years of crochet experience or professional design skills. By focusing on foundational stitches, clear incremental shaping, and safe assembly methods, this pattern serves as the ultimate confidence-booster for any maker. Not only do these sensory rattles soothe teething infants during fussy moments, but they also stimulate early cognitive development through gentle, soothing sounds and varied tactile textures.
In this comprehensive guide, we will walk you step-by-step through every single phase of bringing your cute animal rattle to life—from selecting hyper-safe, machine-washable yarns to mastering the internal rattle box insertion and clean finishing details. Grab your favorite hook, settle into your favorite cozy crafting nook, and let’s dive into the wonderful world of baby amigurumi!
- Why This Project is Perfect for Beginners
When first starting out with amigurumi or baby toys, selecting the right project is crucial for maintaining your creative momentum and avoiding early frustration. Large blankets take weeks to finish, and complex garments require intricate sizing math. This cute animal rattle hits the absolute sweet spot for several distinct reasons:
Instant Gratification & Speed: Because amigurumi rattles are compact and quick to stitch, you can easily complete an entire toy in a single afternoon. This rapid progression keeps crafting exciting, highly motivating, and deeply rewarding.
Mastery of Core Stitches: This pattern relies primarily on foundational techniques such as the magic ring, single crochet (sc), and simple invisible decreases (inv-dec), giving you a safe, stress-free space to perfect your tension and stitch consistency.
Low Material Overhead: You only need small amounts of yarn scraps and basic polyester stuffing, making this an extremely budget-friendly way to produce luxury handmade baby items without spending a fortune.
High Demand & Gifting Value: Handmade baby rattles are universally adored at baby showers, holiday gatherings, and nursery photo shoots. They make unforgettable, cherished keepsakes that parents treasure for years to come.
Introduction to Sensory Design: This project introduces you to incorporating safe sensory elements, such as enclosed rattle inserts and textured animal ears, which are essential foundational skills for expanding into more advanced toy-making projects. - Choosing the Right Yarn & Tools (Materials Guide)
Crafting for infants requires the utmost care regarding material selection. A newborn’s skin is exceptionally delicate, and babies naturally explore the world by putting everything straight into their mouths. Therefore, yarn safety, hook ergonomics, and secure accessories are non-negotiable elements of your preparation.
The Ultimate Baby-Safe Yarn
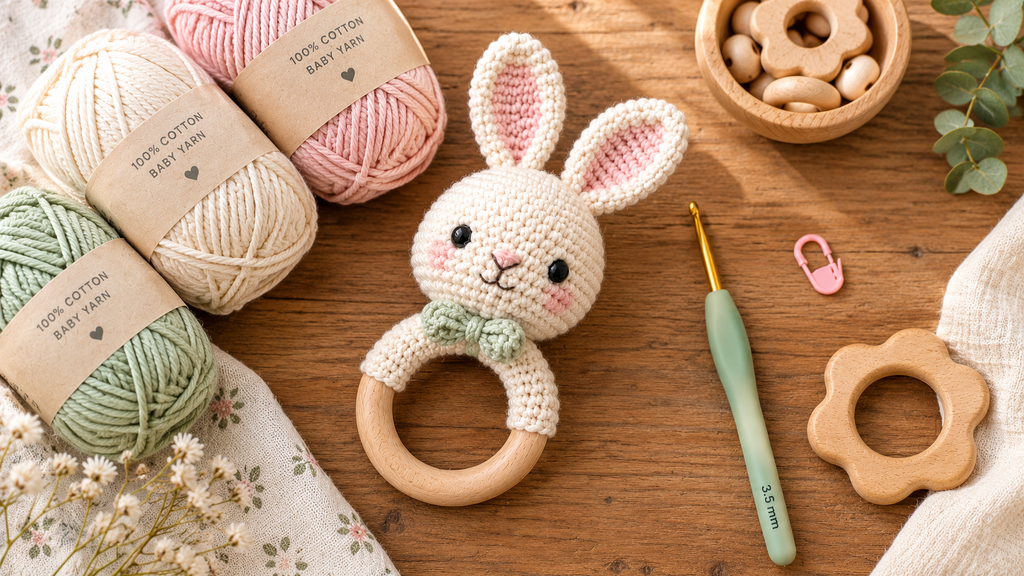
Always avoid heavy, shed-prone wools or rough synthetic fibers that can irritate sensitive skin or pose choking hazards due to loose fluff. Instead, opt for lightweight, breathable, and hyper-allergenic fiber blends such as 100% mercerized cotton or high-grade super-soft baby acrylic. To ensure your rattle remains durable, drool-resistant, and machine-washable across multiple washes, we highly recommend these premium Soft Cotton Yarn Skeins on Amazon. This yarn provides a smooth, tight stitch definition that safely locks in your internal stuffing.
Ergonomic Hooks for Stress-Free Stitching
Working with tight amigurumi tension can sometimes strain your fingers and wrists if you use standard, unpadded metal hooks. Investing in properly balanced hooks with soft rubberized handles makes a massive difference in your crafting speed and overall comfort. You can check out this beginner-preferred set of Ergonomic Crochet Hooks with Soft Grips on Amazon to ensure every stitch glides smoothly without causing hand fatigue during long crafting sessions.
Charming Wooden Accents & Safe Finishings
To elevate your handmade rattle into a high-end boutique piece, you can anchor the animal head onto a natural, splinter-free wooden teething ring or accent it with rustic touches. Explore these lovely, smooth Natural Wooden Buttons and Rings for Crafts on Amazon to personalize your baby toy securely.

- Baby Rattle Sizing & Proportion Chart
Getting the proportions right is essential so that the rattle handle fits comfortably in tiny baby hands, while the animal head is light enough for safe handling. Use the standardized measurement table below to guide your stitch counts and dimensions.
| Rattle Component | Target Length / Diameter | Recommended Stitch Count | Safety & Design Notes |
| Wooden Ring Base | 2.5″ – 3.0″ inches diameter | N/A (Standard smooth ring) | Must be untreated, splinter-free natural wood. |
| Crochet Handle Grip | 3.5″ – 4.0″ inches length | 8 – 10 stitches in round | Must be snug and securely stitched around the ring. |
| Animal Head (Amigurumi) | 3.0″ – 3.5″ inches diameter | 30 – 36 sts at widest point | Stuffed firmly; secure safety rattle box inside. |
| Ears & Appiqu Details | 1.5″ – 2.0″ inches length | Varies by shape (6–12 sts) | Double-stitched down tightly to prevent pulling. |
Note: Always ensure that all internal elements like rattle inserts are safely sealed inside a secondary crochet pouch or fabric lining before stuffing the main head.
- Step-by-Step Crochet Pattern Instructions & Detailed Assembly
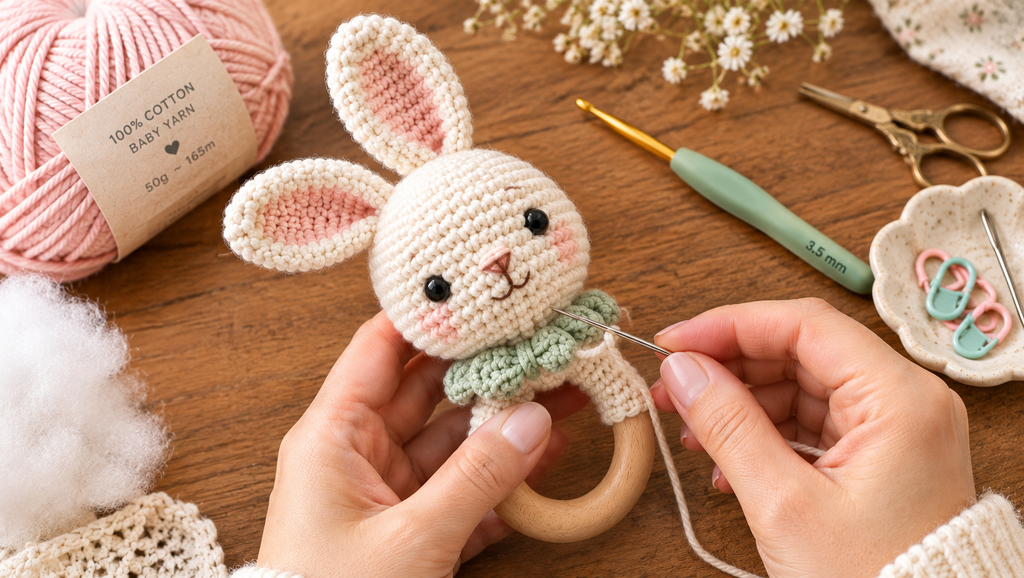
Now that you have your yarn, hooks, and sizing guidelines fully prepared, let’s dive deep into the core pattern creation. This section breaks down the construction of the animal head, the secure sensory rattle box integration, facial embroidery techniques, and the handle assembly into clear, highly detailed, beginner-friendly steps to guarantee a flawless finish.
Part A: The Animal Head (Amigurumi Core Construction)
The animal head is worked in continuous rounds (spirals) starting from the top center crown downward, using fundamental single crochet stitches and gradual, symmetrical increases and decreases to form a smooth sphere.
Step 1: The Magic Ring & Crown Shaping
Begin by creating a secure Magic Ring.
Round 1: Work 6 single crochets (sc) directly into the magic ring. Pull the starting yarn tail tightly to completely close the center hole, ensuring no stuffing can escape later. (6 sts)
Round 2: Work 2 sc in each stitch all the way around. (12 sts)
Round 3: [1 sc in the next stitch, 2 sc in the next stitch]; repeat this sequence from * to * all the way around. (18 sts)
Round 4: [1 sc in each of the next 2 stitches, 2 sc in the next stitch]; repeat around. (24 sts)
Round 5: [1 sc in each of the next 3 stitches, 2 sc in the next stitch]; repeat around. (30 sts)
Round 6: [1 sc in each of the next 4 stitches, 2 sc in the next stitch]; repeat around. (36 sts)
Step 2: Building the Main Head Height and Facial Placement
Rounds 7 through 14: Work 1 sc in every single stitch around without any increases or decreases. (Maintains 36 sts). This crucial section creates the smooth, beautifully rounded upper skull of your cute animal toy, giving it plenty of interior volume for the stuffing and rattle mechanism.
Important Safety & Design Note: If you plan to use embroidered features instead of plastic safety eyes, now is the ideal time to stitch them securely onto the face between rounds 10 and 12 using contrasting dark embroidery floss. Double-knot all internal ends securely so they are completely baby-safe and pull-resistant.
Step 3: Tapering, Stuffing, and Inserting the Rattle Box
Round 15: [1 sc in each of the next 4 stitches, invisible decrease (inv-dec) over the next 2 stitches]; repeat around. (30 sts)
Round 16: [1 sc in each of the next 3 stitches, invisible decrease (inv-dec) over the next 2 stitches]; repeat around. (24 sts)
Crucial Step – Adding the Rattle Insert & Fiberfill: Before closing the head completely, insert your plastic safety rattle box (or a small, securely sealed container filled with smooth crafting beads) directly into the center cavity. Pack high-density polyester fiberfill firmly and evenly around the rattle box so it stays centered and produces a pleasant, muffled sound when shaken rather than a harsh rattle.
Round 17: [1 sc in each of the next 2 stitches, invisible decrease]; repeat around. (18 sts)
Round 18: [1 sc in the next stitch, invisible decrease]; repeat around. (12 sts)
Fasten off your yarn, leaving a long 12-inch tail for sewing. Use a tapestry needle to weave the tail through the front loops of the remaining 12 stitches, pull firmly to cinch the base closed completely, and tie a strong anchoring knot.
Part B: Crafting the Animal Ears & Muzzle Details
Every cute animal amigurumi toy needs its signature character features! Whether you are designing a floppy-eared bunny, a sleepy bear, or a sweet kitty, follow these precise guidelines for crafting and attaching them securely.
Crocheting the Animal Ears (Make 2):
Start with a magic ring, work 6 sc into it.
Increase evenly in the following round to reach 10 sts.
Work even rows of single crochet for 4 to 5 uninterrupted rounds until the ear reaches approximately 1.5 to 2 inches in length.
Fasten off, leaving a long sewing tail. Pro Tip: Do not stuff the ears with fiberfill; instead, flatten them neatly before pinning and stitching them securely onto the upper sides of the animal head between rounds 3 and 7.
Embroidering Facial Features:
Using a length of black or dark brown embroidery thread, stitch a charming little nose, a cheerful smiling mouth, and delicate, sleeping eyelashes. Ensure all knots are tied tightly on the inside before closing up the head.

- Embellishments, Assembly & Final Finishing
Once your amigurumi animal head is fully stuffed, securely sealed, and accessorized with its handmade ears, it is time to mount and integrate it onto your wooden handle base or teething ring.
Attaching to the Wooden Ring Base: Wrap a small, tightly-stitched rectangular crochet band securely around the base of the wooden ring, joining the edges together with clean slip stitches or secure whip stitches using matching yarn. Ensure the animal head is sewn firmly onto this handle base using double-locking reinforced stitches to withstand heavy pulling, chewing, and daily infant use.
Adding Natural Wooden Accents & Tags: You can attach a smooth, organic Natural Wooden Button or Ring for Crafts on Amazon as a decorative tether or sensory tag near the base to enhance tactile engagement.
Rigorous Quality & Safety Check: Always perform a physical pull-test on every ear, facial embroidery stitch, and the main head-to-handle connection point to guarantee there are completely zero loose fibers, threads, or parts before gifting or selling your finished handmade creation. - Troubleshooting Common Amigurumi Mistakes & Expert Fixes
Even experienced handmade creators occasionally run into minor hiccups when constructing 3D stuffed toys. Here is how you can quickly identify and fix them like a professional:
Stuffing is Poking Out Between Stitches: If white polyester fiberfill is visible through gaps in your crochet fabric, your crochet hook size is likely too large for your chosen yarn weight. Switch down a half-size hook to achieve tighter, cleaner, and much safer tension.
The Animal Head Looks Lopsided or Uneven: Uneven distribution of stuffing is the primary cause of anatomical asymmetry. Make sure you add tiny pinches of stuffing incrementally, working it evenly into the corners, crown, and sides rather than pushing one large, dense clump into the center all at once.
The Rattle Sound is Too Muffled or Silent: If the internal rattle box is completely buried against a massive block of dense stuffing, it won’t vibrate or make enough sound. Keep the stuffing tightly packed around the outer walls of the head while leaving a small, strategic air pocket directly surrounding the rattle box.

- Conclusion, Care Tips & Exploring More Free Patterns
Creating handmade sensory toys for infants is undeniably one of the most rewarding, heartwarming, and fulfilling ways to channel your crafting passion. With this comprehensive, step-by-step free pattern, you now possess all the guidance, sizing insights, and material knowledge needed to craft a gorgeous, boutique-quality Cute Animal Amigurumi Toys for Babies: Free Crochet Rattle Pattern. Whether you are stitching these charming animal rattles as thoughtful, memorable gifts for an upcoming baby shower, building inventory for your online handmade shop, or simply enjoying a relaxing and creative weekend project, every single stitch represents warmth, care, and love.
To ensure your handmade cotton and amigurumi pieces stay soft, hygienic, and durable across multiple months of active play, remember to always hand-wash them gently in cool water with a mild, baby-safe detergent, reshaping them carefully and laying them flat to dry rather than using a high-heat machine dryer. Taking these small maintenance steps guarantees that your handcrafted heirlooms will remain pristine and safe for the little ones.
Your creative journey doesn’t have to stop here! If you loved working on this adorable sensory project, you will surely enjoy expanding your baby accessory collection with other delightful items. Be sure to check out our previous step-by-step guide on how to create a cozy winter set through our Cozy Crochet Baby Mittens & Hat Set: Free Winter Pattern to bring even more warmth, style, and handmade love into your nursery crafting.
Now that I have shared everything you need to know about this pattern, I truly hope this guide inspires your next crafting project! Thank you so much for reading and spending your time here. Happy crocheting!