Disclosure: This post contains affiliate links. As an Amazon Associate, we earn a small commission from qualifying purchases at no extra cost to you. We only recommend products we truly love and trust.
As someone interested in the world of baby crochet, in this article I’m excited to share a free crochet pattern for creating a cozy winter set for babies. This adorable handmade set is perfect for keeping little ones warm and comfortable during the colder months.
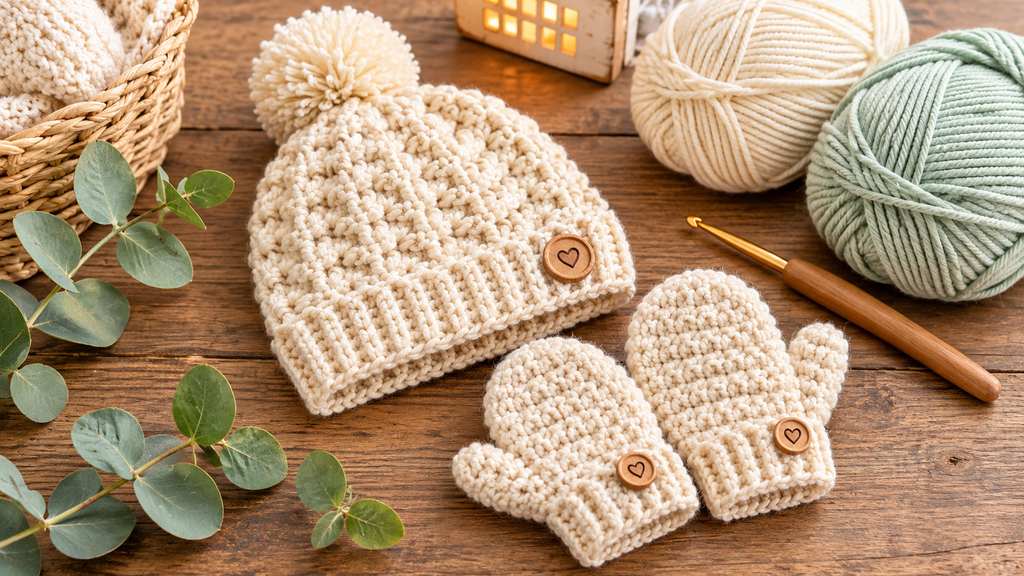
Winter is fast approaching, and there is truly nothing more rewarding than wrapping a newborn or toddler in handmade warmth. As the cold winds set in, protective accessories become an absolute essential for every baby’s wardrobe. That is where this adorable Cozy Crochet Baby Mittens & Hat Set comes into play. Crafted with gentle textures, soft yarns, and practical sizing, this matching winter set provides the ultimate blend of style, comfort, and functionality.
If you are a beginner high in enthusiasm but intimidated by complex garment patterns, this project is designed explicitly for you. Creating soft, boutique-quality winter gear for little ones does not require decades of crochet experience or intricate stitch techniques. With foundational stitches, simple shaping, and quick completion times, this pattern serves as the perfect confidence-builder for any maker.
Beyond keeping tiny fingers and ears warm during winter strolls, this matching set makes an unforgettable gift for baby showers, gender reveal parties, holiday photoshoots, and family heirlooms. Nothing conveys love and thoughtfulness quite like a gift crafted stitch by stitch with your own hands. In this comprehensive guide, we will walk you through every single phase of the process—from picking the safest skin-friendly yarn to executing perfect ribbing and assembling cute details. Grab your favorite crochet hook, cozy up in your crafting corner, and let’s get started!
- Why This Project is Perfect for Beginners
When first embarking on your crochet journey, selecting the right project is essential for staying motivated. Large blankets can feel overwhelming, while adult clothing requires complex sizing adjustments. This baby mittens and beanie set strikes the absolute sweet spot for several distinct reasons:
Instant Gratification & Speed: Because baby garments are small, you can finish an entire mitten in less than an hour and the matching hat in a single evening. This rapid progress keeps crafting fun and deeply satisfying.
Mastery of Foundational Stitches: This pattern focuses heavily on fundamental crochet techniques, including single crochet (sc), half double crochet (hdc), and working into back loops only (BLO) to create elastic ribbing. It provides an ideal playground for mastering your stitch tension.
Minimal Shaping & Seamless Logic: Unlike adult beanies or fitted mittens with thumb gussets, baby mittens do not require complicated thumb shaping. They feature a straightforward pouch design that keeps tiny hands warm without unnecessary technical difficulty.
Cost-Effective Crafting: You will only need one or two small skeins of yarn to complete the entire set. This makes it an incredibly budget-friendly way to produce luxury-looking handmade baby clothes without spending a fortune.
High Demand & Practicality: Babies constantly lose tiny mittens and outgrow hats. Having a quick, go-to free pattern allows you to whip up multiple color combinations in a flash for your own family or your online handmade shop. - Choosing the Right Yarn & Tools (Materials Guide)
Selecting the appropriate materials is arguably the most critical step when crafting for infants. A newborn’s skin is exceptionally delicate and prone to allergic reactions or friction irritation. Therefore, yarn composition, hook ergonomics, and finishing accents require thoughtful selection before making your first slip knot.
The Perfect Baby-Safe Yarn
Avoid scratchy acrylics or heavy rough wools that can scratch sensitive skin. Instead, opt for lightweight, breathable, and hyper-allergenic fiber blends such as cotton-bamboo or high-grade super-soft baby acrylic. To ensure your project remains smooth, durable, and machine-washable, we highly recommend trying these ultra-gentle Soft Cotton Yarn Skeins on Amazon. This yarn provides an exceptionally soft texture against delicate cheeks while maintaining stitch structure across multiple washes.
Ergonomic Hooks for Effortless Crafting
Crafting small stitches with fine yarn can sometimes strain your fingers and wrists. Using standard metal hooks without padded grips often leads to early fatigue. Investing in properly balanced, smooth aluminum hooks with soft rubberized handles makes a massive difference in your crafting speed and comfort. You can check out this beginner-preferred set of Ergonomic Crochet Hooks with Soft Grips on Amazon to ensure every stitch glides effortlessly without snagging.
Charming Wooden Buttons & Finishing Touches
While the crochet stitches themselves look lovely, adding tiny aesthetic details elevates your winter set from a basic craft to a high-end boutique piece. Adding small natural wooden buttons onto the ribbed brim of the hat or anchoring mitten cords with rustic wooden tags adds timeless bohemian charm. Explore these lovely Natural Wooden Buttons for Crafts on Amazon to personalize your baby set with a clean, handcrafted accent.

- Baby Hat & Mitten Sizing Chart
Getting the fit right is essential so that the beanie covers tiny ears comfortably without slipping down over the eyes, and the mittens stay securely on squirming hands. Use the standardized measurement table below to guide your stitch counts and row lengths across three core baby age stages.
| Age Group | Hat Circumference | Hat Height | Mitten Length | Mitten Width |
| Newborn (0–3 Months) | 12″ – 13″ inches (30–33 cm) | 5.5″ inches (14 cm) | 3.5″ inches (9 cm) | 2.0″ inches (5 cm) |
| 3–6 Months | 13″ – 15″ inches (33–38 cm) | 6.0″ inches (15 cm) | 4.0″ inches (10 cm) | 2.25″ inches (5.7 cm) |
| 6–12 Months | 16″ – 17″ inches (40–43 cm) | 6.5″ inches (16.5 cm) | 4.5″ inches (11.5 cm) | 2.5″ inches (6.3 cm) |
Note: Always measure your baby’s head circumference around the widest part just above the ears when possible, as stretch factors can vary depending on your individual crochet tension.

- Step-by-Step Crochet Pattern Instructions
Now that you have your yarn, hooks, and measurements ready, let’s dive into the core pattern creation. This section is broken down into clear, beginner-friendly steps for both the beanie hat and the cozy mittens, ensuring that you can follow along seamlessly without any confusion.
Part A: The Cozy Baby Beanie Hat
The beanie is worked from the bottom up, starting with a snug ribbed band that ensures a comfortable, flexible stretch around the baby’s head, followed by the main body worked in simple half double crochet (hdc) stitches.
Step 1: Creating the Elastic Ribbed Band
Using your ergonomic crochet hook and soft yarn, start by chaining 6 stitches.
Row 1: Working into the second chain from the hook, work 1 single crochet (sc) in each chain across. Chain 1, turn. (You will have a total of 5 stitches).
Row 2: Working exclusively in the Back Loop Only (BLO) for the entire row to create that signature ribbed texture, work 1 sc in each stitch across. Chain 1, turn. (5 sts).
Repeat Row 2 continuously until your ribbed band stretches to match the desired hat circumference from our sizing chart (for instance, about 12 to 13 inches for a newborn size). Make sure not to stretch it too tightly while measuring.
Once you reach the correct length, bring the two short ends of the band together and join them with a slip stitch to form a seamless circular loop. Do not cut your yarn; you will now transition seamlessly to working directly along the long edge of the band to build the main body of the hat.
Step 2: Working the Main Body of the Hat
Round 1: Chain 1, and evenly work half double crochet (hdc) stitches all the way around the top raw edge of the ribbed band. Take your time spacing these stitches out evenly. Join with a slip stitch to the top of the first hdc. (The final stitch count will depend on your sizing stage, typically ranging between 40 to 48 stitches).
Rounds 2 through X: Chain 1, and work 1 hdc in each stitch all the way around. Join with a slip stitch to the first stitch of the round. Continue repeating this simple, relaxing round until the hat reaches your target hat height from the measurement table (such as 5.5 inches for newborns).
Once the desired height is attained, fasten off your yarn, making sure to leave a generous 10-inch yarn tail which will be used shortly for closing the crown.
Step 3: Cinch Closing the Top & Securing Ends
Thread your 10-inch yarn tail onto a tapestry needle. Weave the needle in and out through the stitches of the final round, moving all the way around the circle.
Pull the yarn tail tightly to cinch the top of the beanie completely closed, drawing it together like a pouch. Secure it firmly with a sturdy double knot on the inside of the hat. Use your needle to weave in all remaining loose ends cleanly.
Part B: The Matching Cozy Baby Mittens (Make 2)
Baby mittens are worked from the wrist upward using a straightforward pouch construction method that eliminates the need for complicated thumb shaping, making them remarkably fast and enjoyable to complete.
Step 1: Crafting the Mitten Cuff
Just like the hat, begin by creating a small ribbed cuff for the wrist. Chain 5.
Row 1: Work 1 sc in the second chain from the hook and in each chain across. Chain 1, turn. (4 sts).
Row 2: Working in the Back Loop Only (BLO), work 1 sc in each stitch across. Chain 1, turn.
Repeat Row 2 until the cuff strip measures about 3.5 to 4 inches long. Slip stitch the short ends together to form a tiny ring.
Step 2: Constructing the Hand Pouch
Round 1: Chain 1, and work 24 hdc evenly distributed around the outer edge of the cuff ring. Join with a slip stitch to the first stitch.
Rounds 2 through 6: Chain 1, work 1 hdc in each stitch around. Join with a slip stitch at the end of each round. (This builds the main cozy hand enclosure).
Round 7 (Gentle Tapering): To softly shape the top of the mitten so it fits little hands nicely, work alternating stitches: [1 hdc in the next stitch, hdc decrease over the next 2 stitches]. Repeat from * to * all the way around. Join with a slip stitch.
Fasten off, leaving a short tail. Thread your tapestry needle to cinch the top opening shut, secure a tight knot on the inside, and weave in any remaining yarn ends. Repeat this exact process to create the second matching mitten.

- Embellishments & Final Finishing Details
Once your beanie hat and mittens are fully stitched, cinched, and woven in, it is time to elevate the entire set from a simple handmade project into a boutique-grade masterwork using thoughtful, safe decorative touches.
Adding Natural Wooden Buttons: Take your natural wooden buttons and carefully sew one or two onto the side of the hat’s ribbed band or near the cuff of the mittens. Ensure they are stitched on extremely tightly with reinforced knots so there is zero risk of a baby pulling them loose or creating a choking hazard.
Attaching a Cute Pom-Pom: If you prefer a playful look, you can craft a small matching yarn pom-pom or attach a faux-fur pom-pom securely to the crown of the beanie for an extra dash of winter charm.
Threading a Drawstring (Optional for Older Infants): For babies aged 6 to 12 months who tend to pull things off, you can crochet a simple chain cord of 50 stitches and weave it loosely through the rows right above the cuff of the mittens to help keep them securely fastened during outdoor walks. - Troubleshooting Common Beginner Mistakes
Even with the clearest instructions, makers occasionally encounter minor bumps along the way. Here is how you can troubleshoot and fix them quickly and efficiently:
The Hat is Flaring Out Like a Bowl: If your hat is widening outward instead of staying straight up, you likely added accidental extra increases at the ends of your rounds. Always count your stitches at the end of each round to ensure a consistent, straight stitch count.
The Mittens Look Uneven in Size: Hand tension naturally fluctuates as we crochet. If one mitten feels noticeably tighter than the other, check that you are using the exact same hook size and maintaining a relaxed, uniform grip throughout both pieces.
Stiff and Rigid Fabric Texture: If your finished stitches feel stiff rather than fluid and soft, your yarn weight and hook size might not be properly matched. Try going up a half-size on your crochet hook to restore flexibility, stretch, and softness to the garment.

- Conclusion, Care Tips & Exploring More Free Patterns
Creating winter accessories for the little ones in your life is undeniably one of the most rewarding and heartwarming ways to channel your crafting passion. With this comprehensive, step-by-step free pattern, you now possess all the guidance, sizing charts, and material insights needed to craft a gorgeous, boutique-quality Cozy Baby Mittens & Hat Set. Whether you are stitching these pieces as thoughtful, handmade gifts for an upcoming baby shower, building inventory for your online handmade shop, or simply enjoying a relaxing and creative weekend project, every single stitch represents warmth, care, and love.
To ensure your handmade wool and cotton pieces stay soft and durable across multiple seasons, remember to always hand-wash them in cool water with a mild, baby-safe detergent, and lay them flat to dry rather than using a high-heat machine dryer. Taking these small maintenance steps guarantees that your handcrafted heirlooms will remain pristine and cozy for months to come.
Your handmade journey doesn’t have to stop here! If you loved working on this cozy winter project, you will surely enjoy expanding your baby accessory collection with other delightful items. Be sure to check out our previous step-by-step guide on how to create a gentle sensory toy through our How to Crochet a Safe Baby Bunny Rattle: Easy Step-by-Step Pattern for Beginners to bring even more joy and interactive learning into your nursery crafting.
- We would love to see how your wonderful creations turn out! Feel free to tag us in your finished project photos, share your favorite color combinations, or leave any questions in the comments below. Happy crocheting, and stay wonderfully warm!