Disclosure: This post contains affiliate links. As an Amazon Associate, we earn a small commission from qualifying purchases at no extra cost to you. We only recommend products we truly love and trust.
As someone passionate about baby crochet, I am excited to share this step-by-step guide to crafting a cozy baby cardigan, along with valuable tips to help you succeed in this rewarding craft.
Welcome, dear readers! As someone deeply passionate about the world of babies and toddlers, there is nothing quite as rewarding as crafting a cozy, handmade garment for a little one. If you have been searching for a charming, practical, and beginner-friendly project, you are in the exact right place. A crochet baby cardigan sweater is the ultimate classic keepsake—it is versatile, warm, and remarkably quick to complete due to its small size.
Many beginners feel intimidated by the thought of crocheting an entire piece of clothing, assuming it requires complex tailoring or advanced stitch techniques. However, making a soft, boutique-quality baby cardigan is far simpler than it looks! By breaking the project down into basic geometric shapes and fundamental stitches, even a novice crafter can complete this project with confidence.
In this comprehensive guide, we will walk you through every single detail: from choosing non-allergenic yarn and selecting ergonomic tools to following a universal sizing chart and executing a clear, step-by-step pattern. Let’s dive in and turn a simple skein of yarn into a treasured baby wardrobe staple!

- Why a Crochet Baby Cardigan is the Ultimate Beginner Project
When transitioning from simple flat items like blankets or dishcloths to actual wearable garments, a baby cardigan sweater is widely considered the absolute best starting point for crafters. Here is why this project builds your skills quickly without overwhelming you:
Quick Gratification: Because baby garments are small, you can complete an entire cardigan in just a few evenings. This fast progress keeps your motivation high and allows you to practice fundamental techniques without committing weeks of work.
Minimal Construction Hazards: Unlike adult garments that require precise body contouring, baby clothing features a relaxed, boxy fit. This loose silhouette offers plenty of leeway for minor tension inconsistencies or slight sizing variations.
Mastering Essential Core Techniques: Working on a cardigan introduces you to foundational garment-building skills—such as stitch increases, shaping armholes, joining seams, working ribbed borders, and sewing buttonholes—all on a manageable, micro-scale.
The Perfect Heartfelt Gift: Whether you are preparing a baby shower gift, building a cozy wardrobe for your own infant, or crafting seasonal products for your online boutique, a handmade cardigan carries unmatched emotional value. - Choosing the Right Baby-Safe Yarn & Essential Tools
Selecting the correct materials is the most critical step in creating a baby garment. Infant skin is exceptionally delicate, highly sensitive, and prone to irritation, making safety, softness, and washability your top priorities.
ESSENTIAL MATERIAL CHECKLIST
[1] Hypoallergenic DK/Light Worsted Yarn (Cotton/Acrylic)
[2] Ergonomic Crochet Hook (4.0 mm – 4.5 mm)
[3] Locking Stitch Markers & Tapestry Needle
[4] Natural Wooden Decorative Buttons (15mm)
A. The Best Yarn Fibers for Infants
When shopping for baby sweater yarn, always look for tags labeled DK (Double Knitting), Light Worsted (Weight 3), or Sport Weight.
- Cotton-Acrylic Blends (Recommended): A 50/50 blend of cotton and acrylic offers the absolute best of both worlds. The natural cotton fibers provide breathability and softness, while the acrylic adds lightweight bounce, elasticity, and shape retention after multiple machine washes.
- 100% Superwash Merino Wool: If you prefer natural animal fibers for winter warmth, ensure it is treated “Superwash” so parents can machine-wash it on a gentle cycle without shrinking or felting.
- Fibers to Avoid: Avoid 100% stiff, cheap acrylic yarns that feel scratchy against delicate skin, as well as fuzzy mohair or novelty yarns that shed loose fibers tiny fingers and mouths could ingest.
👉 Click the link to check the price on Amazon
- B. Ergonomic Hooks & Supporting Accessories
Working with small garments requires precision and comfort. Using the right tools reduces hand fatigue and keeps your stitch tension even throughout the project:
Ergonomic Crochet Hook (Size 4.0 mm / G-6 or 4.5 mm / 7): A hook with a soft rubberized or silicone handle prevents cramping during longer crafting sessions and ensures smooth yarn gliding.
👉 Click the link to check the price on Amazon
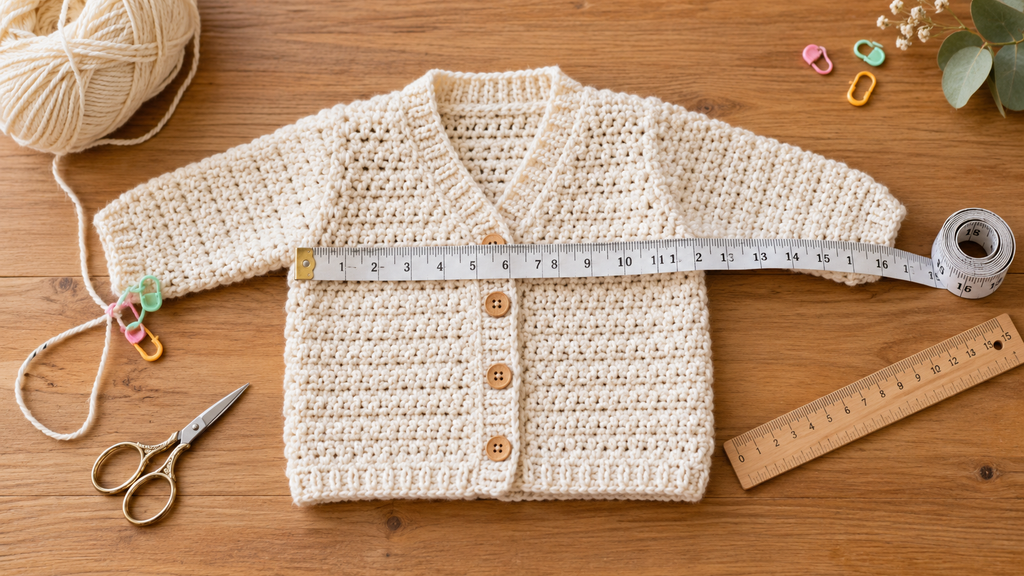
- Locking Stitch Markers: Absolutely essential for marking raglan increase corners, counting rows, and ensuring symmetrical sleeve attachments.
Blunt Tapestry Needle: Required for weaving in loose yarn ends securely and sewing on decorative buttons without splitting yarn fibers. - Universal Baby Cardigan Sizing Chart (0 to 24 Months)
To ensure your handmade sweater fits comfortably over everyday baby onesies, always measure against standard infant body dimensions. Below is a mobile-responsive sizing guide detailing finished garment measurements, recommended yarn quantities, and hook sizes across four standard age brackets:
| Age Range | Chest Width (Flat) | Total Sweater Length | Sleeve Length (Underarm) | Estimated Yarn Yardage | Recommended Hook |
| Preemie / Newborn | 8.0 in (20 cm) | 8.5 in (21.5 cm) | 5.5 in (14 cm) | 220 – 260 yards | 3.75 mm (F-5) |
| 0 – 3 Months | 9.0 in (23 cm) | 9.5 in (24 cm) | 6.0 in (15 cm) | 280 – 320 yards | 4.00 mm (G-6) |
| 3 – 6 Months | 10.0 in (25.5 cm) | 10.5 in (26.5 cm) | 6.5 in (16.5 cm) | 350 – 400 yards | 4.00 mm (G-6) |
| 6 – 12 Months | 11.0 in (28 cm) | 11.5 in (29 cm) | 7.5 in (19 cm) | 420 – 480 yards | 4.50 mm (7) |
| 12 – 24 Months | 12.0 in (30.5 cm) | 13.0 in (33 cm) | 8.5 in (21.5 cm) | 500 – 580 yards | 4.50 mm (7) |
Pro Tip for Perfect Sizing: Baby growth rates vary significantly! If you are crafting a gift and are unsure of the baby’s exact measurements, always size up to the 6–12 months category. Infants grow rapidly, and a slightly larger cardigan can easily be worn with rolled-up sleeves until they grow into it.

- Step-by-Step Crochet Baby Cardigan Pattern
Crocheting a top-down seamless baby cardigan is an absolute joy because it minimizes sewing and allows you to check the fit as you go. For this pattern, we will use basic stitches (Half Double Crochet – HDC) to ensure a soft, dense, and warm fabric that is completely safe for infants.
Phase A: The Yoke and Raglan Increases
The yoke forms the upper chest and shoulders of the sweater, utilizing raglan increases to shape the armholes seamlessly. - Foundation Chain: Depending on your chosen size, chain the required length loosely (e.g., 52 chains for the 3-6 months size). Ensure your chain is not twisted before joining.
- Row 1 (Setup Row): Work 1 Half Double Crochet (HDC) in the 3rd chain from the hook and in each chain across. Turn your work.
- Row 2 (Raglan Increase Row): Chain 2 (counts as first HDC here and throughout). Work HDC across until you reach the raglan marker point. In the designated corner stitch space, work [2 HDC, Chain 1, 2 HDC] to create a sharp, clean corner expansion. Repeat this increase across all four corners (Left Front, Left Sleeve, Back Panel, Right Sleeve, Right Front). Turn.
- Rows 3 to 6: Continue repeating the raglan increase pattern on every row. This expands the yoke outward, forming the exact armhole depth needed for your baby’s size. Measure the depth against your sizing chart to ensure accuracy before moving to the next phase.
Phase B: Separating the Body and Sleeves
Once your yoke reaches the correct armhole depth, it is time to divide the garment sections: - The Split: Work across the Right Front panel in HDC, then skip all stitches belonging to the Right Sleeve. Chain 3 loosely under the armpit to create extra ease, and join directly to the Back Panel with an HDC.
- Continuing the Body: Work HDC across the Back Panel, skip the Left Sleeve stitches, chain 3 for the second armpit under-bridge, and finish with HDC across the Left Front panel.
- Body Length: Work straight rows of HDC downward from the underarm split until the cardigan reaches your desired total length (referencing your sizing chart). Fasten off cleanly and weave in your tails.
Phase C: Working the Sleeves in the Round - Re-attach your yarn securely at the bottom center of the armpit opening.
- Chain 2 and work HDC evenly around the armhole opening, picking up the 3 underarm chain stitches.
- Work in seamless spirals or join each round with a slip stitch, decreasing by 1 stitch every few rows to give the sleeve a gentle, tapered look toward the wrist cuff.
- Finish with 2 rows of Front Post / Back Post Half Double Crocheted ribbing for a stretchy, snug wrist border. Repeat for the second sleeve.
- Edging, Buttonbands, and Final Finishing Touches
The structural integrity and neatness of a baby cardigan rely heavily on its final borders and secure hardware attachments.
A. Front Buttonbands & Collar - Attach your yarn at the bottom right front corner of the cardigan opening.
- Work a clean border of single crochet (SC) stitches all the way up the right front edge, evenly around the neckline collar, and down the left front edge.
- On the buttonhole band (usually the right side for girls, left for boys), create evenly spaced buttonholes by working Chain 2, skip 2 stitches wherever a button is planned. On the return row, work 2 HDC over that chain space to lock the buttonhole securely in place.
B. Adding Natural Wooden Buttons
To maintain a safe, organic aesthetic that parents adore, sew on smooth, chemical-free wooden buttons using a blunt tapestry needle and strong matching yarn. Ensure every button is double-anchored so curious little fingers cannot pull them loose.
👉 Click the link to check the price on Amazon
- Troubleshooting Common Beginner Challenges
Even with a detailed guide, crafters occasionally run into minor roadblocks. Here is how to fix them instantly:
Stiff or Rigid Fabric: If your cardigan feels stiff instead of drape-y, your hook size is likely too small or your hand tension is too tight. Switch up one hook size (e.g., from 4.0mm to 4.5mm) and relax your grip.
Curling Front Edges: If the front buttonbands start rolling outward, work an extra round of Crab Stitch (Reverse Single Crochet) around the entire perimeter to flatten and seal the edges.
Asymmetrical Sleeves: Always count your stitches at the end of every sleeve round. Discrepancies usually happen when accidental increases occur near the underarm bridge. - Elevate Your Crafting Journey & Related Inspiration
If you loved creating this sweet baby cardigan and want to expand your handmade wardrobe collection, we have plenty of wonderful resources waiting for you!
Recommended Digital Masterclass
Take your skills to the next level with our complete 100-page e-book: The Ultimate Crochet Baby Booties, Hats & Keepsakes Masterclass. It is packed with row-by-row instructions, size charts, and matching beanie patterns to complete your baby gift sets!
Explore More Seasonal Ideas
Planning ahead for festive photo shoots or autumn celebrations? Don’t miss our comprehensive style guide on the Top 6 Soft & Non-Slip Crochet Baby Booties for Halloween for more cozy seasonal inspiration!

Conclusion
Crafting a handmade baby cardigan sweater is far more than just a simple DIY project—it is a true labor of love that transforms basic yarn into a cherished keepsake for a precious little one. Throughout this comprehensive guide, we have walked through every essential phase: from selecting hypoallergenic, baby-safe fibers and ergonomic tools to mastering the seamless top-down raglan construction, adding neat buttonbands, and ensuring a comfortable fit with our universal sizing chart.
Whether you are preparing a heartfelt gift for an upcoming baby shower, building a cozy everyday wardrobe for your own infant, or crafting boutique-quality pieces for your online storefront, this project proves that garment-making is entirely accessible to beginners. We hope this step-by-step tutorial has empowered your creativity, boosted your confidence with hooks and yarn, and inspired you to take on even more exciting crafting adventures. Grab your favorite colorway, explore our other pattern collections, and start creating your next heartwarming handmade masterpiece today!
Now that I’ve shared everything you need for this project, I hope you enjoy selecting the perfect materials to craft a beautiful, cozy sweater for your little ones!