Disclosure: This post contains affiliate links. As an Amazon Associate, we earn a small commission from qualifying purchases at no extra cost to you. We only recommend products we truly love and trust.
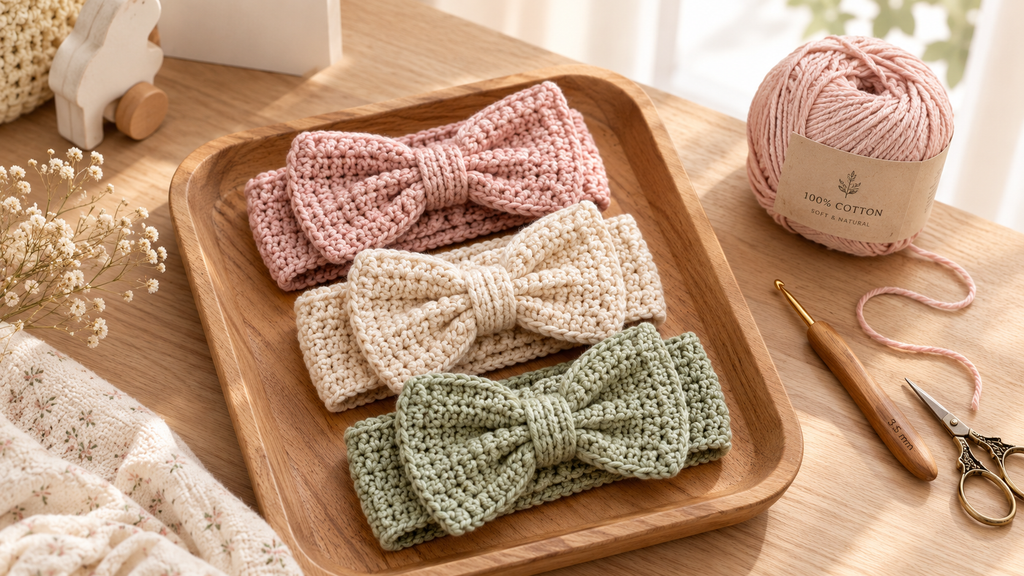
Welcome to the ultimate guide for crafting the sweetest, softest, and most versatile crochet baby headbands and matching bows! If you are looking for a quick, rewarding, and budget-friendly crafting project, baby headbands are the absolute gold standard. Whether you are creating a thoughtful handmade baby shower gift, expanding your boutique online shop inventory, or building a colorful accessory collection for your little one, these delicate accessories take less than an hour to complete and require minimal yarn.
In this step-by-step masterclass, we will walk you through everything you need to know: selecting gentle, skin-safe fibers, mastering accurate stretch sizing for newborns up to toddlers, and working up our signature free pattern seamlessly.
- Why Crochet Baby Headbands Are the Ultimate Beginner Project
If you are new to the world of garment or accessory crafting, tackling large projects like blankets or sweaters can sometimes feel overwhelming. Baby headbands offer the perfect entry point into crochet for several practical reasons:
Instant Gratification: Unlike complex garments that require days of labor, a crochet baby headband can be completed in just 30 to 45 minutes. This makes it an ideal project for busy parents or makers looking for quick wins.
Minimal Material Investment: You can easily craft 4 to 6 complete headband sets out of a single 50g skein of yarn. It is the ultimate “stash-buster” project for using up leftover premium yarns.
Mastering Essential Foundations: Headbands teach you core foundational skills—such as working in flat rows, maintaining even edge tension, joining seamlessly, and shaping decorative bows—without the stress of complex sizing calculations.
High Commercial Value: Handmade baby accessories are among the top-selling items on platforms like Etsy and localized craft markets. They carry high profit margins and serve as excellent impulse-add items for buyers. - Choosing the Right Baby-Safe Yarns & Tools
Infant skin is exceptionally delicate, thin, and prone to irritation. Choosing the correct yarn and tool combination is crucial to ensure your headbands remain soft, breathable, stretchy, and safe for daily wear.
A. Selecting the Perfect Yarn Fiber
Always prioritize natural, breathable, or hypoallergenic fibers that feel silky against delicate skin: - Cotton-Bamboo Blends (Ideal Choice): Combines the structural stability of natural cotton with the silky sheen and anti-bacterial softness of bamboo. Excellent for summer and year-round wear.
- Premium Baby Acrylics: Look specifically for OEKO-TEX certified or anti-pilling baby acrylics. They provide wonderful elasticity, vibrant color retention, and are easy to machine wash.
- Superwash Merino Wool: Best suited for autumn and winter headbands. Superwash merino provides luxurious warmth without the itchiness of standard sheep wool.
👉 Click the link to check the price on Amazon
- B. Ergonomic Hooks and Supporting Accessories
Working with lightweight yarn requires precise hook selection to ensure your stitches remain stretchy rather than stiff:
Hook Size: A 3.5 mm (E-4) or 4.0 mm (G-6) crochet hook is recommended for most Light Worsted or DK baby yarns. Using an ergonomic handle prevents hand fatigue during repeat sessions.
Flexible Measuring Tape: Essential for taking accurate head circumference measurements.
Tapestry Needle & Scissors: A blunt-tipped yarn needle ensures clean weaving without splitting fine fibers.
Decorative Accents: Natural, smooth wooden buttons can be used as adjustable closures or central bow anchors.
👉 Click the link to check the price on Amazon
- Universal Crochet Baby Headband Sizing Chart
Achieving the perfect fit is all about understanding elastic ease. A headband must fit snugly enough to stay in place without leaving marks on the baby’s forehead. As a general rule, your finished crochet band should be 1 to 2 inches (2.5 to 5 cm) smaller than the actual head circumference to account for stretch.
Use this mobile-optimized chart as your master reference guide:
| Age Category | Actual Head Circumference | Finished Band Length (Unstretched) | Band Width | Approx. Yarn Needed |
| Preemie | 11″ – 12″ (28 – 30 cm) | 9.5″ – 10.5″ (24 – 27 cm) | 1.0″ – 1.25″ | 15 yards |
| Newborn (0-3M) | 13″ – 14″ (33 – 36 cm) | 11.5″ – 12.5″ (29 – 32 cm) | 1.5″ (3.8 cm) | 20 yards |
| Baby (3-6M) | 14″ – 16″ (36 – 41 cm) | 12.5″ – 14.5″ (32 – 37 cm) | 1.5″ – 1.75″ | 25 yards |
| Infant (6-12M) | 16″ – 18″ (41 – 46 cm) | 14.5″ – 16.0″ (37 – 41 cm) | 2.0″ (5.0 cm) | 30 yards |
| Toddler (12-24M) | 18″ – 19″ (46 – 48 cm) | 16.0″ – 17.5″ (41 – 44 cm) | 2.0″ – 2.25″ | 35 yards |
Pro Tip: If you are crafting headbands as gifts or selling them online where exact head measurements aren’t available, stick to the Finished Band Length column for standard commercial sizing success!

- Step-by-Step Crochet Baby Headband & Bow Pattern
This simple, highly elastic ribbed pattern creates a soft texture that hugs baby heads gently without digging in.
Part A: The Stretchy Ribbed Headband
Foundation:
Leave a 6-inch yarn tail for sewing. Chain 7 (for a standard 1.5-inch wide band, or chain more/fewer to customize width).
Row 1:
Single Crochet (SC) in the 2nd chain from the hook and in each chain across. Turn. (6 stitches)
Row 2 (The Ribbing Secret):
Chain 1 (does not count as a stitch). Work Single Crochet in the Back Loop Only (BLO) across every stitch until you reach the final stitch.
Work a standard SC through both loops of the final stitch to maintain clean, sturdy edges. Turn. (6 stitches)
Rows 3 to Desired Length:
Repeat Row 2 continuously. The Back Loop Only technique creates a springy, accordion-like stretch that adapts comfortably as baby grows.
Continue working rows until the unstretched length matches your targeted Finished Band Length from the Sizing Chart (e.g., 12 inches for 0-3M size).
Joining the Loop:
Align the foundation edge with your working row. Slip stitch (SL ST) through both thickness layers across to form a seamless circular loop.
Fasten off yarn and weave in ends neatly.
- (Continued) Step-by-Step Crochet Baby Headband & Bow Pattern
Part B: Crafting the Classic Bow Accent
No headband is complete without a charming, elegant centerpiece! While the headband itself provides comfort and functionality, the bow is what delivers that irresistible boutique appeal. This simple flat-rectangle bow method allows you to create a gorgeous, plump bow that holds its shape permanently without sagging or drooping over time.
Foundation: Chain 25 using your 3.5 mm crochet hook (or chain more if you prefer a larger, oversized statement bow).
Row 1: Single Crochet (SC) in the 2nd chain from the hook and in each chain across. Turn your work carefully. (24 stitches total)
Rows 2 to 8: Chain 1 (does not count as a stitch). Work one SC in the first stitch and into each stitch across the row. Turn. Repeat this process until your rectangular strip measures approximately 2.5 inches (6.5 cm) in height.
Creating the Perfect Hourglass Pinch: Fasten off your yarn, leaving a generous 12-inch tail for assembly and shaping. Fold the finished rectangular piece horizontally so the short outer edges meet at the exact center back. Using your tapestry needle, take a few quick stitches to join those ends together. Next, pinch the middle of the rectangle with your fingers to form three neat, symmetrical accordion folds. Wrap the remaining yarn tail firmly around the exact center 5 to 6 times to form a tight, pinched center. Secure tightly with a hidden double knot at the back.
Part C: The Center Knot Band & Assembly
To give your bow a polished, store-bought finish, a small crocheted center band is wrapped over the gathered yarn threads to completely conceal them.
Foundation: Chain 12 (or enough to wrap around the thickest part of your pinched bow).
Row 1: SC in the 2nd chain from the hook and in each chain across. Fasten off, leaving a 6-inch yarn tail.
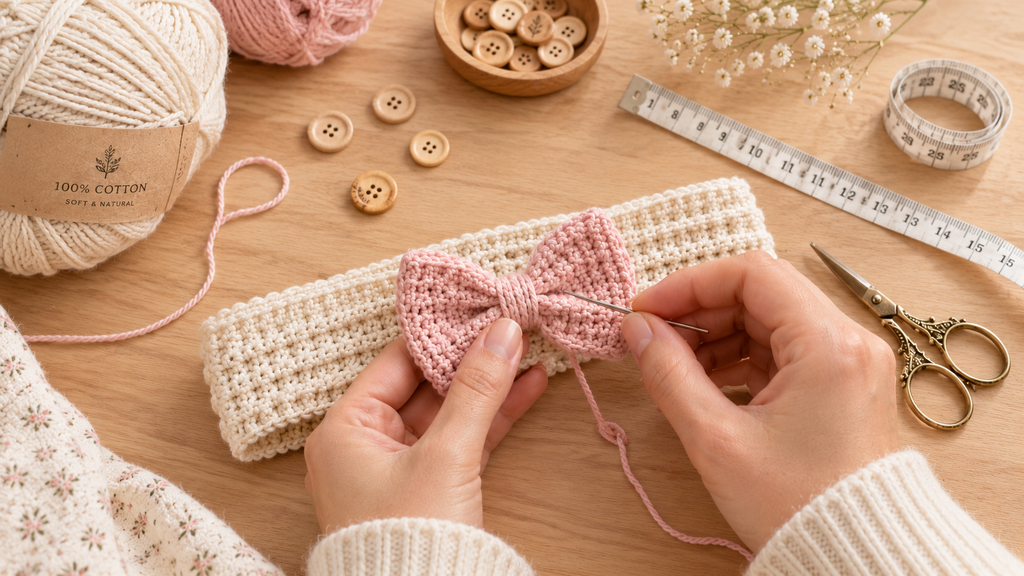
Assembly: Wrap this thin strip horizontally around the gathered center of your prepared bow. Pull the short ends snugly to the back of the bow, use your tapestry needle to stitch them together securely, and trim any excess yarn.
- Advanced Customization & Creative Variations
One of the greatest benefits of making crochet baby headbands is how easy it is to adapt a single base pattern into dozens of unique, eye-catching styles. By making tiny adjustments to stitch textures or decorative elements, you can quickly build a diverse product catalog for your shop or personal collection:
The Knot-Bow Variation: Instead of stitching a structured flat bow, simply lengthen your headband base strip by 4 inches. Tie the two loose ends of the headband together into a simple, charming top-knot directly on the forehead for a modern, minimalist boho look.
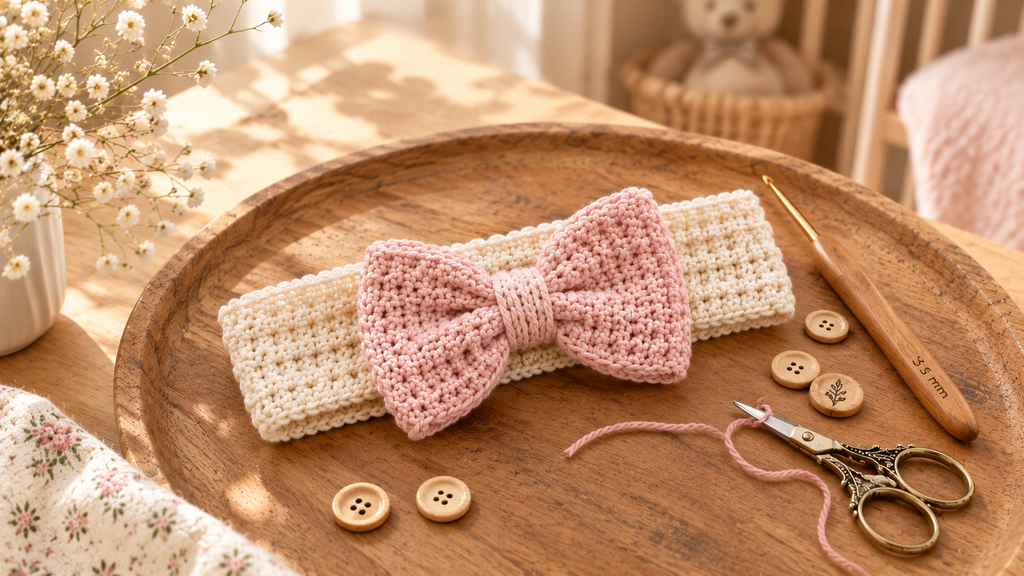
Multi-Color Contrast Bands: Craft the ribbed headband using a rich neutral shade (like oatmeal, camel, or cream) and craft the accent bow using a vibrant pastel tone (such as blush pink, sage green, or soft lavender). This subtle color contrast makes the centerpiece pop beautifully in photographs.
Double-Layer Ribbon Bows: Combine your hand-crocheted bow with a thin background layer of natural linen or lace fabric. Layering different textures creates a luxury, high-end look that appeals strongly to buyers looking for specialized baby shower gifts. - Embellishments & Professional Finishing Touches
Elevating your handmade crochet headbands from a simple amateur craft project to a premium, boutique-quality product relies entirely on clean execution, secure attachment techniques, and smart embellishments.
Securing the Bow Permanently: Baby accessories undergo a lot of stretching, washing, and tugging. Never rely on fabric glue to attach your bows. Always use a matching strand of durable yarn or strong cotton thread to anchor the bow firmly onto the headband seam. Pass your needle through multiple thick stitch layers at the back of the bow to ensure it cannot be pulled off by active infants.
Adding Natural Wooden Buttons: For an organic, eco-friendly aesthetic, attach a small, polished wooden button directly to the center band of the bow or alongside the edge seam. Wooden accents provide a lovely rustic charm that elevates the entire design.
👉 Click the link to check the price on Amazon
- Weaving in Loose Ends Securely: Loose yarn ends can quickly ruin an otherwise perfect garment after its first machine wash. Thread your yarn tails onto a blunt-tipped tapestry needle and weave them back and forth through at least three to four distinct stitch pillars in opposite directions before trimming close to the fabric.
Steam Blocking for Superior Shape: Always take five minutes to steam-block your finished headbands! Hold a garment steamer or steam iron about 2 inches away from the acrylic or cotton fabric without touching it directly. The gentle moisture relaxes tight stitches, evens out row edges, and gives the headband a crisp, professional shape ready for packaging or photography. - Troubleshooting Common Beginner Mistakes
Even though baby headbands are fast, accessible, and enjoyable to make, beginner crafters occasionally run into a few structural challenges. Here is how to diagnose and fix those issues instantly:
A. The Headband Is Curled or Twisting
The Cause: This usually occurs when your foundation chain is pulled too tight, or when working standard single crochet rows without maintaining uniform edge tension.
The Fix: Always use a hook size half a millimeter larger (e.g., a 4.0 mm hook) specifically for your foundation chain, then drop down to your working hook size (3.5 mm) for Row 1. Additionally, ensure you are working into the Back Loop Only (BLO) consistently across every single row.
B. The Headband Is Too Tight or Leaves Red Marks
The Cause: Working with rigid, non-stretchy synthetic yarns or holding your working yarn with extremely tight tension will eliminate natural elastic give.
The Fix: Switch to a high-elasticity fiber like a premium cotton-bamboo or baby merino blend. Always measure your finished band unstretched against our master sizing chart—remember that the band should be only 1 to 2 inches smaller than the baby’s actual head circumference to allow for comfortable stretch without squeezing.
C. The Bow Looks Floppy and Loses Its Shape
The Cause: Using loose, open stitches (like double or treble crochets) or working with an oversized hook creates a limp, flimsy fabric that cannot support its own weight.
The Fix: Stick strictly to dense, compact stitches like single crochet or half double crochet for the bow section. If you want an extra-crisp structure that stands up straight on top of the headband, lightly spray the back of the bow with fabric stiffener or starch spray before stitching it into place.
- Conclusion: Crafting Memories, One Stitch at a Time
Crafting your own crochet baby headbands and bows is far more than just a quick weekend project—it is a delightful journey into creating soft, handmade keepsakes that bring warmth, charm, and personality to a baby’s first wardrobe. Throughout this ultimate step-by-step guide, we have covered every single detail you need to ensure success on your very first try:
Choosing Safe Materials: Selecting skin-safe, hypoallergenic cotton-bamboo yarns and comfortable ergonomic hooks to protect delicate newborn skin.
Mastering Elastic Sizing: Utilizing our precise, mobile-friendly sizing chart (from Preemie to 24 Months) to guarantee a cozy fit with just the right amount of stretch.
Step-by-Step Construction: Following our simple Back Loop Only (BLO) ribbing technique and classic gathered bow design to achieve boutique-quality results.
Finishing & Troubleshooting: Adding natural wooden buttons, weaving ends securely, and steam-blocking your finished pieces to avoid common beginner mistakes like curling edges or floppy bows.
Whether you are crafting a heartwarming baby shower gift, building a colorful collection for your own little one, or adding best-selling inventory to your online handmade shop, these quick headband patterns offer endless opportunities for creative customization.
Ready to Take Your Baby Crochet Skills to the Next Level?
If you loved making these adorable headbands and want to expand your handmade nursery collection, check out our recommended resources and related pattern guides:
📚 Grab Our Masterclass E-book: Take your craft further with The Ultimate Crochet Baby Booties, Hats & Keepsakes Masterclass for comprehensive, step-by-step patterns on matching booties and newborn sets!
🎃 Explore Seasonal Ideas: Looking for more charming footwear to match your new headbands? Read our guide on Top 6 Soft & Non-Slip Crochet Baby Booties for Halloween.
Now that you have all the tools, patterns, and sizing secrets at your fingertips, pick up your yarn, select your favorite pastel shades, and enjoy creating beautiful, cozy accessories for the little ones in your life. Happy crocheting!