Disclosure: This post contains affiliate links. As an Amazon Associate, we earn a small commission from qualifying purchases at no extra cost to you. We only recommend products we truly love and trust.
Dear readers, as someone who is deeply passionate about the art of baby crochet, I am thrilled to share this guide with you. In this article, I will walk you through the essential step-by-step techniques designed specifically for beginners, helping you build confidence and create beautiful handmade pieces for little ones. I truly hope you find this guide helpful and inspiring on your crafting journey!
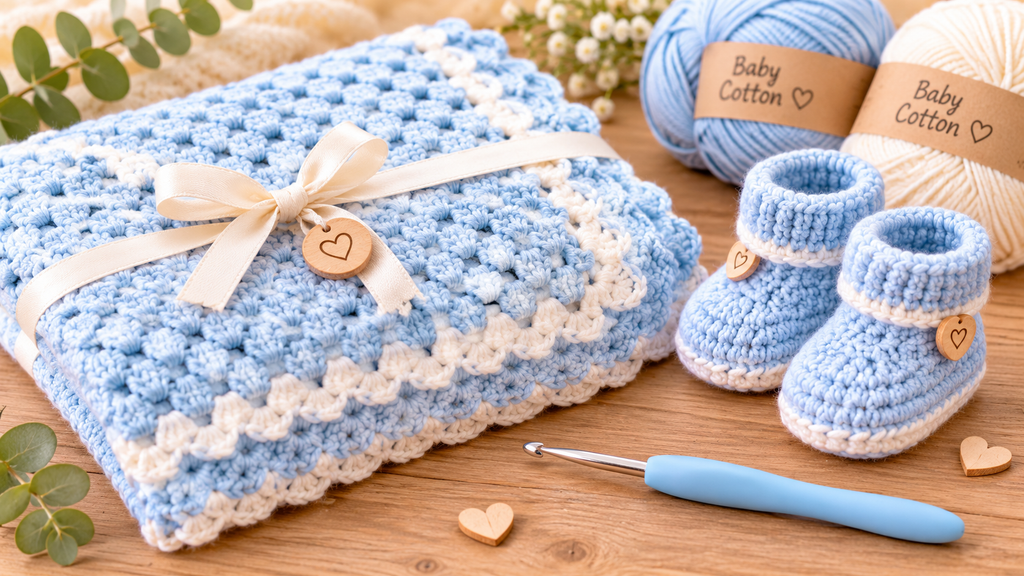
Starting your first handmade project for a baby is one of the most rewarding journeys in craftwork. Whether you are creating a cozy crib blanket or tiny matching booties, mastering a few foundational stitches will set you up for absolute success.
This comprehensive guide breaks down the essential stitches, sizing standards, step-by-step instructions, and finishing touches needed to craft beautiful, safe handmade items for little ones.
- Why Baby Blankets and Booties Are Perfect for Beginners
Baby blankets and booties serve as the ideal starting point for anyone learning to crochet:
Manageable Project Size: Booties take less than an hour to complete, offering fast gratification and quick feedback on your tension.
Repetitive Stitch Patterns: Blankets allow you to practice basic stitches over long rows, building muscle memory and even stitch counts without complex shaping.
Low Material Investment: A single skein of premium yarn is often enough for a complete pair of booties and a small security blanket.
Cherished Keepsakes: Handmade baby items make heartfelt shower gifts that families treasure for years. - Choosing the Right Baby-Safe Yarns and Essential Tools
Selecting the right materials guarantees that your finished items remain soft, washable, and gentle on sensitive skin.
Baby-Safe Yarns: Opt for lightweight, hypoallergenic fibers like combed cotton, OEKO-TEX certified acrylic, or bamboo blends. Avoid scratchy wools or fibers that shed loose hairs. A popular, incredibly soft choice is Bernat Baby Blanket Yarn, which offers plush warmth and easy machine-washability.
Ergonomic Crochet Hooks: Hand fatigue can interrupt your flow. Using an Ergonomic Crochet Hook Set with Rubber Handles ensures a comfortable grip during extended crafting sessions.
Safety Details: When adding closures or accents to baby wearables, choose smooth, natural embellishments like Natural Wooden Sewing Buttons that are stitched down tightly to eliminate choking hazards.
Choosing the Right Baby-Safe Yarns and Essential Tools:
Selecting the right materials guarantees that your finished items remain soft, washable, and gentle on sensitive skin:
Baby-Safe Yarns: Opt for lightweight, hypoallergenic fibers like combed cotton, OEKO-TEX certified acrylic, or bamboo blends. Avoid scratchy wools or fibers that shed loose hairs. A popular, incredibly soft choice for cozy blankets is Bernat Baby Blanket Yarn, which offers plush warmth and easy machine-washability.
Ergonomic Crochet Hooks: Hand fatigue can interrupt your flow during longer crafting sessions. Working with a comfortable Ergonomic Crochet Hook Set with Rubber Handles ensures smooth stitch control and reduces strain on your wrists.
Safety Details: When adding closures or decorative accents to baby wearables, choose smooth, natural embellishments such as Natural Wooden Sewing Buttons. Ensure they are stitched down tightly to eliminate choking hazards.
- Standard Sizing Chart for Baby Blankets and Booties
Use this quick-reference table to choose the correct dimensions for your project before starting your foundation chain.
| Item Category | Target Age / Type | Recommended Dimensions | Average Yardage |
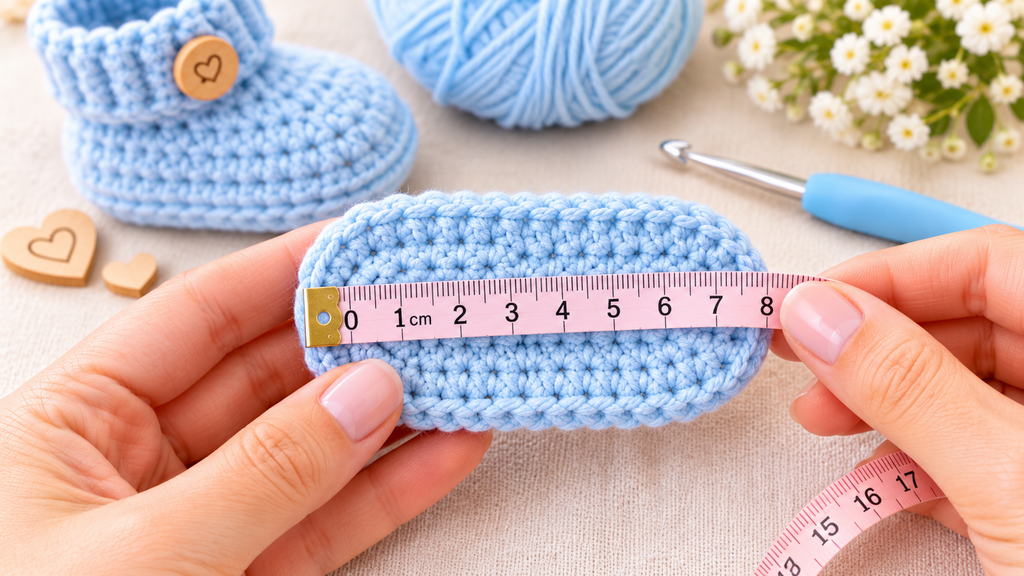
| Booties | Preemie / Newborn | Sole Length: 3.25 inches (8 cm) | 40 – 60 yards |
| Booties | 0 – 6 Months | Sole Length: 4.0 inches (10 cm) | 60 – 80 yards |
| Booties | 6 – 12 Months | Sole Length: 4.5 inches (11.5 cm) | 80 – 100 yards |
| Blanket | Lovey / Security | 12 x 12 inches (30 x 30 cm) | 150 – 200 yards |
| Blanket | Stroller / Car Seat | 30 x 36 inches (76 x 91 cm) | 700 – 900 yards |
| Blanket | Standard Crib | 36 x 52 inches (91 x 132 cm) | 1,200 – 1,500 yards |

- Step-by-Step Pattern Breakdown
Essential Stitches to Know
Before working on the main pattern, ensure you are comfortable with these core stitches: - Chain Stitch (ch): The foundation for all projects.
- Single Crochet (sc): Creates a dense, warm fabric perfect for soles and borders.
- Double Crochet (dc): Adds flexibility, drape, and speed to larger blanket rows.
Step 1: The Basic Bootie Base - Foundation: Chain 11.
- Round 1: Single crochet in the 2nd chain from hook and in the next 8 chains. Work 3 single crochets into the last chain to turn the corner. Continue along the bottom of the chain: single crochet 8, work 2 single crochets in the final chain. Join with a slip stitch to the first stitch. (22 stitches total)
- Round 2: Chain 1, work 2 single crochets in the first stitch, single crochet 8, work 2 single crochets in each of the next 3 stitches, single crochet 8, work 2 single crochets in the last 2 stitches. Join. (28 stitches total)
- Sides & Cuff: Work 4 rounds of single crochet in the back loops only to build the walls, then shape the toe using double-crochet decreases.
Step 2: The Coziest Beginner Baby Blanket - Foundation: Chain 75 (or any odd number until your chain reaches your desired width).
- Row 1: Double crochet in the 4th chain from hook and in each chain across. Turn.
- Row 2: Chain 3 (counts as first double crochet), double crochet across all stitches. Turn.
- Repeat: Continue Row 2 until your piece matches your desired length from the sizing chart above.
- Finishing Touches and Safe Embellishments
Adding clean edges and safe details transforms simple pieces into boutique-quality gifts:
Single Crochet Border: Work a round of single crochet evenly around the entire blanket edge, placing 3 single crochets into each exact corner to keep the edges flat.
Secure Attachment: Securely weave in all loose ends with a blunt yarn needle using a 3-way direction technique to prevent unraveling during machine washing.
Safe Buttons: If adding decorative button straps to booties, double-knot your thread on the inside of the fabric and sew through all button holes multiple times. - Beginner Troubleshooting & Common Fixes
Uneven Edges on Blankets:
Cause: Skipping the first stitch or accidently working into the turning chain.
Fix: Count your stitches at the end of every 3rd row, and use stitch markers in the first and last stitches of each row.
Curling Fabric:
Cause: Foundation chain tension is too tight.
Fix: Switch to a hook one size larger than recommended for the initial chain, then return to your main hook size for Row 1.
Stiff Booties:
Cause: Hook size is too small for the chosen yarn weight.
Fix: Increase hook size by 0.5 mm to create a softer, more flexible fabric that molds comfortably to baby feet. - Start Your Next Handmade Project Today
Mastering these basic techniques opens up endless possibilities for creating custom baby sets, thoughtful shower gifts, and heirloom blankets. Pick up your favorite yarn, grab your hook, and begin with a simple bootie or lovey blanket today.

- Comprehensive Step-by-Step Pattern Breakdown, Advanced Stitch Execution, and Material Mastery
To achieve professional results when crafting handmade garments, baby blankets, and accessories for infants, mastering the exact anatomy of each stitch is essential. Every loop, tension shift, and yarn placement dictates how the final fabric will drape, stretch, and feel against a baby’s delicate, sensitive skin. Working with precision ensures that your pieces maintain structural integrity through repeated machine washings while retaining their boutique-quality softness, luxurious texture, and heirloom durability.
Essential Core Stitches Breakdown and Mechanical Execution
Before diving directly into the primary assembly steps, let us review the structural mechanics and physical properties of the three foundational stitches utilized throughout this project: - Chain Stitch (ch): Formed by yarning over the hook and pulling it through the active loop on your hook. This acts as the backbone of your entire creation, establishing the initial width, perimeter framework, and flexibility needed for comfort.
- Single Crochet (sc): Insert your hook into the designated stitch, yarn over, pull up a loop (leaving two loops on your hook), yarn over again, and draw through both loops simultaneously. This technique builds a dense, durable, and highly stable fabric ideal for heavy-wear items like bootie soles and secure blanket borders that withstand daily friction.
- Double Crochet (dc): Yarn over, insert your hook into the stitch, yarn over, pull up a loop (three loops on your hook), yarn over, draw through two loops (leaving two loops remaining on your hook), yarn over, and draw through the final two loops. This adds wonderful drape, flexibility, and accelerated height to larger blanket rows, making your work progress much faster while keeping the fabric light and airy.
Step 1: Crafting the Seamless Bootie Base, Contoured Walls, and Ankle Cuffs
Constructing a newborn bootie requires meticulous attention to shaping the sole so it comfortably cradles the foot without twisting, bunching, or causing pressure points on tiny toes.
Foundation Phase: Begin by creating a slip knot and working a precise foundation chain of 11 stitches using your ergonomic hook and chosen baby-safe yarn. Maintain a relaxed, even tension so the starting chain remains flexible.
Round 1 (The Sole Perimeter): Work 1 single crochet into the 2nd chain from your hook, then continue working 1 single crochet in each of the next 7 chains along the straight edge. In the final, 9th chain of the straight run, work 3 single crochets into that exact same stitch to smoothly turn the corner around the heel or toe curve. Rotate your work to run along the underside of the foundation chain: work 1 single crochet in each of the next 7 chains, and finish the round by working 2 single crochets into the very last chain space. Join the round cleanly with a slip stitch into your very first single crochet. You should now have exactly 28 stitches total anchoring your base securely.
Round 2 (Widening and Structuring): Chain 1 to begin the next height tier. Work 2 single crochets into the very first stitch, then place 1 single crochet into each of the next 8 stitches. Along the curved toe section, work 2 single crochets into each of the next 3 stitches to expand the curvature gracefully and accommodate the wider front of the foot. Proceed down the opposite side by working 1 single crochet in each of the next 8 stitches, and complete the round by working 2 single crochets into each of the final 2 stitches. Join with a slip stitch, bringing your active count to 34 stitches.
Building the Walls: For the next 3 consecutive rounds, omit any increases entirely. Chain 1 and work 1 single crochet into the back loop only (BLO) of every single stitch around. Working exclusively in the back loops creates a crisp, defined 90-degree angle that transforms flat oval soles into standing structural bootie walls that hug the infant’s heel and ankle securely without sagging.
Shaping the Toe Curve: To taper the front of the bootie over the top of the foot, transition temporarily to double crochet stitches. Work your standard side stitches until you reach the center-front toe zone. Execute 4 consecutive double crochet decreases (dc2tog) to arch the fabric inward over the instep, ensuring the toe pocket forms a snug, secure, and protective enclosure. Complete the remaining back-heel stitches with standard single crochets and finish with a slip-stitch join.
Finishing the Ankle Cuff: Complete the footwear design by working 3 rounds of alternating front-post and back-post single crochets around the ankle opening. This creates a ribbed, highly elastic texture that keeps the booties firmly in place on active baby feet without restricting blood circulation or leaving tight red marks on delicate skin. Fasten off your yarn securely, leaving a 6-inch tail for weaving.
Step 2: Constructing the Heirloom Baby Blanket with Uniform Tension
Blankets require a rhythm of consistent tension across hundreds of repetitive stitches to ensure the outer edges remain completely straight, symmetrical, and professional in appearance.
Foundation Chain Mastery: Begin with a loose foundation chain of 75 stitches. Pro Tip: If your natural crafting style tends to pull stitches tightly, use a crochet hook that is one full millimeter larger just for this initial foundation chain, then switch back to your designated standard hook for Row 1. This prevents the bottom edge of the blanket from puckering, curling, or bowing upward.
Row 1 (Setting the Base Line): Skip the first 3 chains from your hook (these count as your first turning double crochet). Work 1 double crochet into the 4th chain, and continue placing exactly 1 double crochet into every single chain across the entire row until you reach the final stitch. You should have a clean, uniform line of sturdy stitches ready for building.
Row 2 and Row Building: Chain 3 (this counts as your initial turning stitch and never receives an active working stitch beneath it). Turn your work around carefully. Skip the space directly below the chain-3, and work 1 double crochet into the second stitch and into every stitch across the row, ending with a final double crochet worked into the top of the turning chain from the previous row to maintain straight margins.
Scaling and Height Progression: Repeat Row 2 continuously until your fabric reaches your preferred blanket length from your reference guide. Periodically lay your work flat across a clean surface every 10 rows to measure width consistency with a soft tape measure, ensuring no accidental stitch drops or additions occurred along the side margins during crafting.

- Elevating Your Craft: Bringing Handmade Warmth to Every Stitch
Crafting handmade items for infants is far more than a simple creative pastime; it is an intentional acdouble crochets for breathable baby blankets—you acquire a versatile skill set capable of producing tailored, boutique-quality pieces. Each project reinforces core techniques such as tension control, stitch alignment, and edging precision, ensuring your finished work remains safe, soft, and durable enough to withstand daily use and repeated washings.
As you embark on your crafting journey, remember that consistency and high-quality materials are key to achieving flawless results. Choosing hypoallergenic, certified soft yarns alongside ergonomic tools ensures that both the creative process and the final product are as rewarding as possible. Whether you are crafting a cozy lovey blanket, a pair of custom bootie slippers, or a complete heirloom crib set, every stitch reflects thoughtfulness and personalized care that factory-made items simply cannot replicate.

If you are looking for a quick and dedicated project focused specifically on footwear, you can also check out our detailed guide on how to craft Easy Crochet Baby Booties for Beginners, which provides step-by-step instructions and a free pattern.
Now that I’ve shared the foundational steps of this wonderful craft with you, the next step is to choose the right basic tools, watch instructional tutorials, and explore educational e-books to refine your skills and make your crafting journey smooth and enjoyable. Thank you so much for reading this guide!